Category Archives: Uncategorized
Long Overdue Absence Explained!!
Hello, Everyone,
I know it’s been months since I had a new post. I first want to apologize for not giving you all a heads up. I assure you, there’s a darn good reason for my absence. So, here’s the story:
I’m pregnant. Now, up through the 4th month, it wasn’t an issue, even with the minor bouts of morning sickness, severe aversion to chicken and extreme acute sense of smell. However, at week 17, my doctor notices that I was funneling. Without going into too much detail, I was given a cerclage to keep from miscarrying. The same thing happened to during our last pregnancy, but it was too late and we miscarried our first son at 17 weeks as well.
It took about 3 weeks to completely heal from the surgery, and, after, I was put in bed rest. No standing for longer than 5 minutes. I can only describe the last 17 weeks as excruciatingly heartbreaking. My husband is a full time, active duty soldier. A very good cook in his own rite, he just didn’t have the time, nor did his 12-16 hour a day schedule allow him to prepare home cooked meals. Needless to say, We’ve been living off fast food, take out restaurants, frozen foods, the hubby’s yummy culinary delights (when possible), and the kindness of a great friend of mine who is also a wonderful cook. (For the record, my hubby did make Thanksgiving dinner complete with a brined turkey, mixed greens, homemade gravy and other super tasty sides.)
All that being said, I would like to thank everyone who has continued to support me and visit the site. Even without updates, I’m over 3000 visits!! And here I thought I’d been forgotten.
Within the next month, and hopefully within the next couple weeks, I will be giving birth to a healthy baby boy. My husband and I could not be more excited or more thankful. I assure you all that I will be back in no time, with some super simple, super delicious meals and dishes for your table. In the meantime, if there are any tips, shortcuts, or advice you’d like, or recipes you’d like to see, feel free to leave me a comment or e-mail me at: audreycooksstuff@yahoo.com
I look forward to hearing from you and getting back into the kitchen once this little guy is born. Until then, HAPPY HOLIDAYS!!!
Mom’s Broccoli Salad
;
Growing up,we pretty much had the same meals every week. Both of my parents worked full days, and most of the time I can remember my cousins staying with us, giving our parents that many more mouths to feed. While my mom was no super chef, but what she did make every week, she made extremely well. One of those dishes, which I constantly make today, is always a hit anywhere I go. That dish is my mother’s Broccoli Salad.
This salad has such simple ingredients, and, as much as I try to add or subtract from the list, it is always the best just the way she makes it, with one exception, the dressing. My mother uses a simple bottled Cole Slaw Dressing, where I’ve spiced things up a tad bit by using a mixture of Cole Slaw and Honey Mustard Dressings. I think it adds just a bit of a kick and takes it up to that next level.
This salad is good for pretty much anything. It’s makes a great vegetarian option for lunch, goes great with burgers and chicken, and is especially complimentary to BBQ. I also wouldn’t count it out with a nice hearty piece of breaded talapia or some fish sticks for the kids. Without further adieu, here’s my spin on my Mommy’s Broccoli Salad.
INGREDIENTS:
- 4 C Broccoli, chopped into florets
- 3/4 C (about 1/2) Red Onion, small dice
- 3/4 C Cheddar Cheese, shredded or small dice (Pepper Jack makes a lovely substitute as well)
- 1/2 C Bacon, crumbled or chopped (About 4 slices) **Leave out for vegetarian option**
- 3/4 C (about 2 stalks) Celery, halved and diced
- 1/2 C Cole Slaw Dressing
- 1 TBSP Lt. Honey Mustard Dijon Dressing (or make your own, combining, 2 to 1, Dijon Mustard to Honey)
1. Begin by slicing strips of bacon into “lardons”, or small strips. Cook them in a pan until brown and crispy. You can also cook full strips and chop them after. Either way is fine.
2. Chop your broccoli into florets. The stalk is completely edible and tastes pretty good. You want to chop your large head into smaller heads. Slice the stalk until you reach the head, Then, begin slicing it into small florets. 


3. Chop your red onion in half and remove the paper on the outside. **Here’s a tip: to help you hold the onion as you chop it, pull the paper, or inedible outer skin, of the onion to the end, but not off. As you get to the end of the onion, this will give you more to hold onto. Slice the onion horizontally about 3 times, then vertically. Now, chop into a small dice. 


4. Chop your cheese any way you like. I found this handy dandy cheese slicer on sale while I was in Germany, but they are definitely sold all over the world. It utilizes a handle with a small wire that slices through any cheese like butter. If you cut a lot of cheese, and I LOVE cheese, this is an awesome little gadget to have, and you can find them on sale all the time. This one is marble, and keeps the cheese nice and cold, but they come in other materials, like wood and plastic, as well. 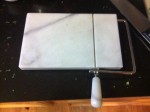
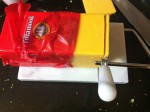

5. Slice celery stalks in half. Feel free to use the leaves as well, and dice.
6. Dump everything into a bowl and toss it lightly. Mix the dressings and pour over the salad. Toss until everything is coated. All Done!
You can make this salad the night before or earlier in the day. If you plan on making this early, my suggestion is to wait until at least 2 hours before serving to add the cheese. I find the cheese tends to get mushy if left in the dressing all day or overnight. I don’t like that much dressing on mine, so I usually don’t have to worry too much about it going mushy if I make it the night before, or eat it a day or 2 later. Make this salad! You will not be sorry. ENJOY!
Crispy Chicken Wrap
 How many times have you wanted a quick, but satisfying lunch without sitting in a line full of cars or using the same lunch meat as always? I work at home, and I find it so easy to either forget to eat, or to get very frustrated by eating the same old thing. Recently, I had a chicken wrap from a fast food restaurant. It was so good. I thought to myself, “I can do this at home.” So I did!
Ingredients per wrap:
- 1 piece of cooked chicken, crispy or grilled and cut into strips
- 1/2 Tomato, thinly sliced
- Red Onion, thinly sliced
- 2 slices of Baby Swiss Cheese
- Handful of Arugula, or Baby Spinach (really any green leaf will work here)
- Honey Mustard Dressing (1 TBSP Mustard, 1 tsp Honey, Salt & Pepper)
- 1 Flour Tortilla
- Drizzle dressing on tortilla.
- Layer with your ingredients, leaving about 2 inches at the bottom for folding.
- Fold tortilla by bringing the bottom 2 inches toward the top. Fold the left over the middle, repeat with the right.
- EAT and Enjoy! How hard was that? Not at all.
I know this is so simple, but when I want something fresh and easy, but certainly different than my usual lunch meat sandwich, this is where I turn. It’s packed with fresh veg and protein. I always keep precooked chicken strips on hand, so all I have to do is pop them in the oven or microwave for a few. I slice and prep everything else, and by the time I’m finished with that, the chicken is ready, and I’m eating. It’s quick enough that I can stop working and pick right back up where I left off, and easy enough that I don’t have to worry about tons of steps. Hope you enjoy this quick lunch!
Do-IT-Yourself Chicken Stock
Making your own stock or base always sounds like a daunting task. Since the first time I ever made my own chicken stock, I’ve worked in my circle of friends and family to promote making chicken stock at home. It’s so simple, why wouldn’t you? Now, to set the record straight, I still buy boxed stock. I have my favorite, and I usually use it when I run out and need it in an emergency, or to mix with my own when I’m using it in multiple recipes.
What’s the benefit to making your own? Well, pretty much the same as anything else you could make from scratch. First and foremost you can determine exactly what goes into it. You feel good about using it and not worrying about the sodium or fat content, because you’re controlling it. You can add as much or as little flavor as you want to! Not that any of your stock would lack in flavor, but say you’re an onion fan, a garlic fan, a mushroom fan… whatever the case may be you can give your stock that flavor. You can make it for specific recipes, too. Probably one of my favorite things about homemade stock is that it cleans out your veggie drawer. Hahaha. Oh, the possibilities. The next question, how do I make this Oh So Simple, Oh So Satisfying chicken stock? Here’s how I did it.
Ingredients:
- 1- 3-4 LB Chicken, innards removed
- 6 to 8 C Water
- 2 Carrots
- 2 Celery stalks, with leaves
- 4 Garlic Cloves
- 1 White or Yellow Onion
- 5 Button Mushrooms
- 1 TBSP Peppercorns
- ** You can add as much or as little of any of these as you like. For this particular batch, I also added a couple parsnips. Mostly because I had a bag of them that needed used.
Now, I know it seems like a lot of water, but I prefer to begin with a ton of water for 2 reasons. 1, it’ll cook down and you can cook it longer to get the most out of all the flavors you’re using. 2, It’ll cook the chicken, and when you’re finished, you’ll have a fully cooked chicken when all is said and done.
- Rinse chicken, remove any innards (heart, neck, liver, etc). Place in a deep stock pot and add water. I like to add enough water that it almost covers the chicken, but not quite. Once you add the veggies, the water will rise.
- Add veggies. You don’t have to peel anything as long as it’s clean. I still peel my onions, carrots and parsnips if they’re really dirty. otherwise, a rinse is fine. Just cut them in halves or quarters and toss them in the pot with the chicken.

- Boil for about 2 hours. Once it’s finished, you will notice it is the color of regular chicken broth. Taste it. It should have a rich chicken flavor.

- Strain the chicken and veggies into a bowl.
- A lot of people let the stock cool. Then, they scrape off the fat layer from the top. I just put the whole thing in the fridge in a container. The next day, the fat will have risen to the top and hardened. It’s easier to remove this way in my opinion. You can now put it in the freezer for up to a month, or back into the fridge for up to a week.
- Discard the veggies or use them in a soup. They’re full of flavor and perfect for blending. As for the chicken, it will fall right off the bone. Use it in a soup, sandwich, or try my shredded BBQ Chicken Nachos recipe.
ENJOY!!!
French Vanilla Dream Ice Cream with an Edible Chocolate Coffee Bowl
THANKS TO ALL OF YOU!!!
YAY! Today we finally broke 1,000 hits on AudreyCooksStuff. I just want to thank all of you for supporting me these past few months. Since I started this site, I’ve realized the deep passion I have for food, as well as others who have motivated me to dig deeper and do more than I thought possible. Happily, this blog has become more than a hobby to me, and I would like to thank all of you who follow my blog, who have left comments and “liked” articles, who have visited my page singularly or regularly, and especially those who have tried my recipes.
I hope to bring you many more delicious recipes and great treats. Please, keep your comments coming, and thank you again.
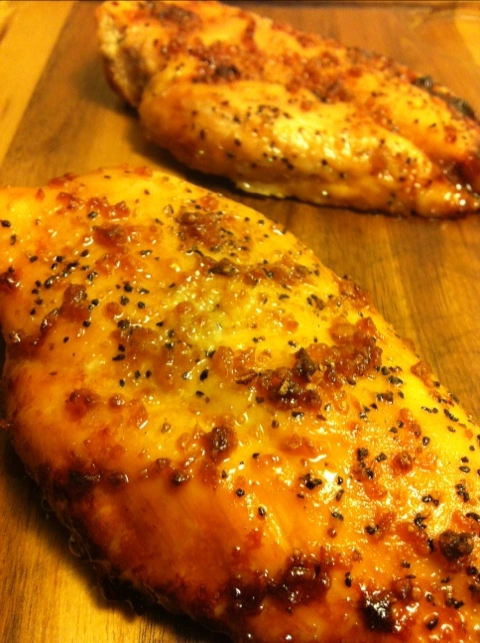
Sweet Garlic Chicken
I can’t tell you how many times I’ve pulled a few chicken breasts out of the freezer and thought to myself, “Hmmmm, what to do with you?” I find that ground beef and chicken are two staples of the average diet that are the most difficult to dress up at times, and many of us often get stuck in a rut of preparing them the same way.
While perusing Pinterest a little while ago, I came upon this recipe that a friend of mine posted. The original recipe can be found at http://www.food.com/recipe/easy-garlic-chicken-5478. I changed it up only slightly. I didn’t take many pics, but there aren’t many steps that need visual explanation. Here’s what to do:
Ingredients:
- 2 Chicken Breasts
- 1/2 tsp each Salt & Pepper
- 2 TBSP Olive Oil + more for drizzling
- 3 Cloves Garlic, minced
- 2 TBSP Brown Sugar
Preheat oven to 450˚ F.
Place chicken breasts in baking dish. (I advise using nonstick foil. Once this is cooked, there is a lot of mess leftover. It just makes cleanup easier.) Drizzle lightly with olive oil and sprinkle both sides with salt and pepper.
In a saucepan, heat 2 TBSP olive oil over medium heat. Add minced garlic to heated oil. Cook until softened, about 2 minutes. Turn off the heat and add the brown sugar. Stirring until combined. Spread the brown sugar mixture evenly over each piece of the side that is facing up.
When oven is heated, bake chicken for 15-20 minutes. Remove and serve.
If feeding more than two people, I would use 1 TBSP Olive Oil and 1 TBSP Brown Sugar per breast, and garlic to taste. Enjoy!
Buttery Carrot Mashed Potatoes
Okay, does anything say comfort food like mashed potatoes? Not for me! I love potatoes, but mashed potatoes are definitely my favorite. There’s nothing better than the creamy, buttery smoothness of a good mash. They are the perfect accompaniment to almost any meal, be it chicken, fish, meat or veg and can be dressed with any sauce.
We’re all familiar with the various herb mash concoctions, garlic and rosemary, brown butter and sage, cheddar and chive, mushroom and onion, the list goes on and on and I have tried them all. But what about the other veggie combos? Mashing your potatoes with other veggies is all the rave, and I am on the rave train! Now, I’ve been mixing my peas and corn with my mashed potatoes since I was a kid. It was pretty much the only way I would eat my veggies. Brussel sprouts… yuck! Brussel sprouts with mashed potatoes… edible! Hahaha. So, I started with a potato and parsnip mash-up. This was the first time I’d ever had parsnips, and the first time I attempted a mash like this. I chopped up the parsnips and potatoes in similar cubes and boiled them together. The floral note in the parsnips was so unexpected, and added a new depth to my potatoes. I made these about 5 more times before my husband finally requested something else. But what?
Well, I see lots of cooking shows where they make a cauliflower and potato mash and everyone’s loving it. I tried it. Delectable… aka, the only way I can get my hubby to eat cauliflower. Awesome, I’ve now used two different veggies in my potatoes. What’s next? Enter: Anne Burrell. I was watching “Worst Cooks in America” and saw a carrot potato mash Chef Burrell made. The problem, they didn’t show how to make it, and I couldn’t find her recipe anywhere online. Not to worry. I’m sure I can figure this out. And I did! Here’s how:
Ingredients:
- Potatoes, peeled and cubed (1 per person)
- Carrots, peeled and cubed (1 per person)
- Buttermilk (or cream or milk as you like)
- Butter
- Salt
Make sure your carrots and potatoes are cut into equal sized cubes. Put in a pot of salted water and turn on high to boil. Boil until both potatoes and carrots are fork tender. Be sure to use a fork, not a knife.

 Once fork tender, strain out the water and add butter before mashing your potatoes as usual. I like using my food pro, for super creamy potatoes, but you can use a stand mixer, hand blender, hand masher, whatever works for you. Add enough buttermilk (or cream or milk) to make your potatoes creamy and smooth, but not runny or soupy. Add slowly and in small amounts at a time. If you add too much liquid, return to your pot and heat over med-low, stirring constantly.
Now, enjoy your potatoes! They are the perfect compliment to any main. Also, I’ve eaten them for dinner when I’m flying solo. They’re just that good!
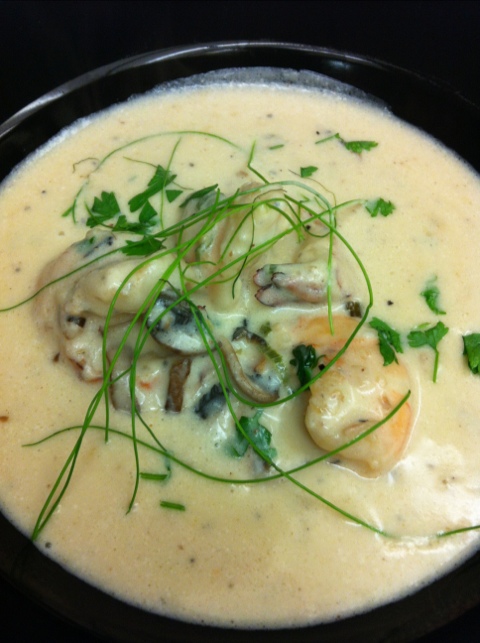
Creamy Shrimp Bisque
When I first posted this recipe, I made it in a bread bowl. The other night, I had a serious craving for this bisque. I was able to find some beautiful jumbo farm raised shrimp in the shell, but, no bread bowl. Guess I got there too late; the bakery was wiped out. No matter! I can have it in a regular bowl just as well as a bread bowl.
I also looked at a few different ways to make it. Same basic recipe, but I made a few tweeks. I like using corn starch much more than flour.
Ingredients
- 4 TBSP Butter
- 1 C Mushrooms, sliced (any will do)
- 1/2 C Green Onions, sliced
- 2 Cloves Garlic, minced
- 1 lb shrimp, raw, deveined, peeled (I also remove the tails. It’s a pet peeve of mine)
- 2-3 C Chicken Broth
- 3 TBSP Corn Starch
- 1/2 C Milk or Heavy Cream (I prefer cream)
- 1/3 C Dry White Wine
- Parsley and Chives for garnish
- *Optional- 2 tsp Crushed Red Pepper Flakes, more or less to your heat’s desire
Start by melting 3 TBSP of butter in a medium pot. Once melted, add mushrooms, green onions, *crushed red pepper flakes and garlic and cook on med/med-low until they begin to soften. You don’t want the onions or garlic to brown because it changes the flavor and you’re going for a fresh and light taste to this bisque.
Once the veggies have softened, add the chicken broth, wine and shrimp and bring the pot to a boil. It doesn’t take long for shrimp to cook, so keep an eye on it. If you are using jumbo shrimp and they are half in and half out of the soup, you may want to turn them to make sure it cooks evenly. Your pot and it’s contents are already hot, so it will come to a boil quickly.
While your bisque comes to a boil, combine the flour and cream into a mixing bowl and whisk until combined. Pour directly into your pot as soon as your shrimp begins boiling and stir. This thickens your bisque. Bring it back up to a boil, then, reduce it to a simmer.
Add the last TBSP of butter. Stir until the bisque is heated through. Allow the bisque to thicken, then remove from heat and serve, garnishing with the roughly chopped parsley and chives.
Sweet & Spicy Wings
Chicken wings come in all sizes and flavors. Walk into any local sports bar, tavern, family restaurant, etc, and if they have wings, they’ll almost always come in more than one flavor. Hot wings, BBQ wings, honey-mustard wings, lemon pepper wings, salt and lime wings, wicked wings, sweet wings, the list goes on and on. Just as long is the list of seasonings you can use for your wings. Everyone has their favorite combination. It begins when you pull them out of the packaging and ends when you start eating. Everything you do to to the wings,from the obvious seasoning, to the dusting, to the resting to the cooking changes the texture and taste of your wings.
I have to admit that chicken wings are one of my favorite foods. They make awesome appetizers or main courses. I am constantly playing around with the flavor and texture of my wings. I’m always trying new techniques to get the crispiest skin and most flavorful meat. There’s not a ton of meat on a chicken wing, but that makes it easier to experiment with and quicker to cook.
This time, I did something a little different. I brined my wings. Usually, you hear about people creating a brine for their Thanksgiving Day turkey. Well, this is pretty similar. A brine is basically saltwater with several other seasonings that intensely flavor the meat. It also forces the meat to hold more water, making it more moist and juicy than without.
I usually try new things, write it down, and try something different next time. If I do something really great, I will repeat and tweak it just a bit. That’s partially what happened this time. I’ve finally got super crispy wings, and I just needed to adjust the spices. Ok, I will stop delaying the goodness. Here’s how I made the best sweet and spicy wings I’ve ever made.

You can taste it before you add the wings. If you want it spicier or sweeter, you can adjust it now.
The Brine:
- 2 TBSP Tony’s Creole Seasoning
- 2 TBSP Kosher Salt
- 1 TBSP Crushed Black Pepper
- 1 tsp Garlic Powder
- 1 tsp Onion Powder
- 1/2 tsp Smoked Paprika
- 1 TBSP Brown Sugar
- 1 TBSP Dijon Mustard
- 1/2 tsp Sriracha (or your favorite hot sauce)
- 3 C Water
- 1 1/2 lbs chicken wings, separated
- Combine everything except the wings in a mixing bowl. Whisk until it’s all combined. Dip a finger in and taste it. Can you taste all the flavors you want? Realizing it’s going to be salty, is the salt overpowering the rest of the spices? Is there a depth of flavor? Every palate is different, so be sure to adjust it as you see fit. This is the flavor that the meat of the chicken will carry, so it should be good to you.
- Separate the wings. This step is completely optional, but I always do it unless I’m serving the other larger parts of the chicken. When I’m serving wings, I think it’s nice for everyone to be able to grab the section they like the most. If you’re not sure how to do this, follow these simple steps:

With a sharp knife, slice the loose skin between the drummette and the wing to help expose the joint.

Drop your wings into the brine and let them sit in the fridge for 2 hours to overnight. The longer, the better.
 Once your wings have marinated in the brine, and you are ready to fry them, remove them and place them in a plastic bag. Seal the bag and let them come to room temp. They need to sit out for at least 30 minutes. Meats remains juicier and more tender when you allow it to come to room temp before cooking. Otherwise, it’ll seize and become tough.
- Once your wings have come to temp, create a breading mixture with: 1 C all-purpose flour, 2 TBSP corn starch, 1 TBSP black pepper, pinch salt.
- Heat your cooking oil of choice in a fryer or frying pan to 320˚ F. This time, I used Crisco original shortening and it worked well. I’ve also used peanut oil and works just as well.
- Toss the chicken in the flour a few pieces at a time. Coat thoroughly and set aside.
- Once your oil reaches temp, drop your wings into the oil and allow them to cook for about 10 minutes. Remove them to a rack over a paper towel to allow excess oil to drip off. Heat oil to 360˚ F. Once heated, drop wings again and fry for 2-3 minutes. Remove them and set to the side.
- Now, for the Sweet & Spicy part. I saw Michael Symon do this and gave it a try. I love it! Mix equal parts honey and sriracha, about 2 TBSP each. Taste it first to make sure it’s not too sweet or spicy. Adjust accordingly. I think this is the perfect ration. Drizzle over chicken wings and serve. ENJOY!


