Monthly Archives: March 2012
Sweet & Spicy Wings
Chicken wings come in all sizes and flavors. Walk into any local sports bar, tavern, family restaurant, etc, and if they have wings, they’ll almost always come in more than one flavor. Hot wings, BBQ wings, honey-mustard wings, lemon pepper wings, salt and lime wings, wicked wings, sweet wings, the list goes on and on. Just as long is the list of seasonings you can use for your wings. Everyone has their favorite combination. It begins when you pull them out of the packaging and ends when you start eating. Everything you do to to the wings,from the obvious seasoning, to the dusting, to the resting to the cooking changes the texture and taste of your wings.
I have to admit that chicken wings are one of my favorite foods. They make awesome appetizers or main courses. I am constantly playing around with the flavor and texture of my wings. I’m always trying new techniques to get the crispiest skin and most flavorful meat. There’s not a ton of meat on a chicken wing, but that makes it easier to experiment with and quicker to cook.
This time, I did something a little different. I brined my wings. Usually, you hear about people creating a brine for their Thanksgiving Day turkey. Well, this is pretty similar. A brine is basically saltwater with several other seasonings that intensely flavor the meat. It also forces the meat to hold more water, making it more moist and juicy than without.
I usually try new things, write it down, and try something different next time. If I do something really great, I will repeat and tweak it just a bit. That’s partially what happened this time. I’ve finally got super crispy wings, and I just needed to adjust the spices. Ok, I will stop delaying the goodness. Here’s how I made the best sweet and spicy wings I’ve ever made.

You can taste it before you add the wings. If you want it spicier or sweeter, you can adjust it now.
The Brine:
- 2 TBSP Tony’s Creole Seasoning
- 2 TBSP Kosher Salt
- 1 TBSP Crushed Black Pepper
- 1 tsp Garlic Powder
- 1 tsp Onion Powder
- 1/2 tsp Smoked Paprika
- 1 TBSP Brown Sugar
- 1 TBSP Dijon Mustard
- 1/2 tsp Sriracha (or your favorite hot sauce)
- 3 C Water
- 1 1/2 lbs chicken wings, separated
- Combine everything except the wings in a mixing bowl. Whisk until it’s all combined. Dip a finger in and taste it. Can you taste all the flavors you want? Realizing it’s going to be salty, is the salt overpowering the rest of the spices? Is there a depth of flavor? Every palate is different, so be sure to adjust it as you see fit. This is the flavor that the meat of the chicken will carry, so it should be good to you.
- Separate the wings. This step is completely optional, but I always do it unless I’m serving the other larger parts of the chicken. When I’m serving wings, I think it’s nice for everyone to be able to grab the section they like the most. If you’re not sure how to do this, follow these simple steps:

With a sharp knife, slice the loose skin between the drummette and the wing to help expose the joint.

Drop your wings into the brine and let them sit in the fridge for 2 hours to overnight. The longer, the better.
 Once your wings have marinated in the brine, and you are ready to fry them, remove them and place them in a plastic bag. Seal the bag and let them come to room temp. They need to sit out for at least 30 minutes. Meats remains juicier and more tender when you allow it to come to room temp before cooking. Otherwise, it’ll seize and become tough.
- Once your wings have come to temp, create a breading mixture with: 1 C all-purpose flour, 2 TBSP corn starch, 1 TBSP black pepper, pinch salt.
- Heat your cooking oil of choice in a fryer or frying pan to 320˚ F. This time, I used Crisco original shortening and it worked well. I’ve also used peanut oil and works just as well.
- Toss the chicken in the flour a few pieces at a time. Coat thoroughly and set aside.
- Once your oil reaches temp, drop your wings into the oil and allow them to cook for about 10 minutes. Remove them to a rack over a paper towel to allow excess oil to drip off. Heat oil to 360˚ F. Once heated, drop wings again and fry for 2-3 minutes. Remove them and set to the side.
- Now, for the Sweet & Spicy part. I saw Michael Symon do this and gave it a try. I love it! Mix equal parts honey and sriracha, about 2 TBSP each. Taste it first to make sure it’s not too sweet or spicy. Adjust accordingly. I think this is the perfect ration. Drizzle over chicken wings and serve. ENJOY!
Easy Pot Roast… Oooooohhhh, the Possibilities
This recipe has two great characteristics everyone loves. 1) It’s super easy. 2) If you follow these simple instructions, you can’t mess it up. Now, I like to keep recipes like this as simple and natural as possible. I like the organic taste of good veggies, and this is another one of those recipes where you can use whatever you have on hand.You can add to or take away from the veggies that I’ve used. I didn’t use potatoes this time, but you can just toss them in with the rest of the veggies. You can cut them large or small, as long as they’re all about the same size.
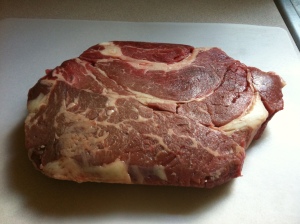
I like a roast that has some fat in it. It keeps the meat moist and adds flavor as it cooks and large pieces can easily be peeled away from your tender, finished roast.
Often you’ll see herbs added to pot roast, like Bay Leaves, Thyme and Rosemary. None of that here. I want the pure flavor of beef and veggies, with a few additions to enhance that flavor. Here’s what I did.
Ingredients:
- 1 lb Beef Roast (or Beef Brisket)
- 2 Carrots, peeled and med dice
- 2 stalks Celery, rinsed and med dice
- 1/2 Onion (white or yellow), small dice
- 1 C Mushrooms, sliced
- 3 Garlic Cloves, smashed and peeled
- 3 C Beef Broth
- 1 C Red Wine (Not necessary, but it adds a ton of flavor)
- Salt and Pepper
- 2 TBSP Olive Oil
- Preheat oven to 350˚ F. (You can slow cook this also. Check down below for the easy way to make it happen.)
- Heat oil in a pan. Meanwhile, season the beef by sprinkling with salt and pepper on both sides. If there’s another seasoning you love on your beef, use it. (Creole seasoning, steak seasonings, meat tenderizer, etc all work well here.) When pan is hot, brown beef on all sides.
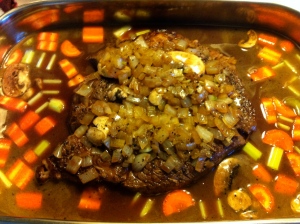
- While browning, prepare roasting pan or dutch oven with lid. Pour beef broth into roasting pan and add veggies except onions. Remove browned beef and place in broth and veggies.
- Deglaze the pan of beef remnants with red wine. Remember to remove the pan from the heat before pouring in wine. Add the onions and scrape up all the bits on the bottom of the pan. Cook the onions for about 2 minutes or until the onions begin to soften. Once the onions have softened, pour the entire pan over the beef.(To add extra flavor, you can cook all the veggies with the onions for about 7-10 minutes, or until they start to brown.)
- Cook 2 hours. Flip the beef and cook for another hour or until super tender. You don’t have to flip it, but I do.
Make this a Slow Cooker Meal:
Chop beef into uniform 1″ chunks. Season and brown on all sides. Dump into slow cooker. Pour wine into pan to deglaze, then add all veggies into pan and cook for about 7-10 minutes until they start to brown. Add to slow cooker, then pour in beef broth. Cook on high for about 2-2 1/2 hours until tender.
What can I do with it afterward? This meal has tons of possibilities once it’s cooked, both for the meat and the veggies. Try these variations.

Once it's this tender, just use a few forks to pull it apart. The large pockets of fat slide right off and can easily be discarded.
- Keep it Simple. Serve the beef sliced over mashed potatoes. Serve the veggies on the side. Pour a ladle of the leftover liquid on top. Mmmmmm.
- Shred the beef in the pan or dutch oven, and mix with the veggies. Serve over brown, long grain, wild, or white rice, mashed potatoes, or egg noodles.
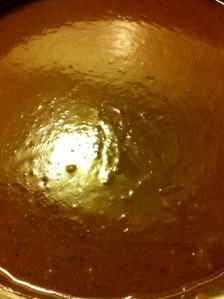
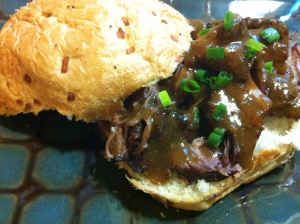
- Remove beef and put on a cutting board. Shred or slice and place on your favorite toasted roll, I like onion rolls from the grocery bakery. Soft, fresh, and perfect when warm and toasty. But what about the veggies? Dump the rest of the pot, liquid and all, in the food pro or blender and process until you get a nice pureed texture.
Now, pour into a sauce pan and heat. Add a few TBSP cream or milk and 1 TBSP butter and whisk until you get a smooth glossy sauce. Ladle over your meat on the bread and top with Slices of red onion or chopped green onions.
- Shred it and add your favorite BBQ sauce for a shredded BBQ sandwich. Add some of your favorite sides to your sandwich and make it a meal!
Vegetarian Orecchiette in 18 minutes or less
So, I have to be honest and say, I’m no vegetarian. I love meat, but I also love to be healthy. For me, this means taking a few days off the meaty stuff to have something a little lighter. There are many recipes you can make that offer even the most devout carnivore a satisfying vegetarian meal. This is definitely one of those times. There are a few tricks I use to make this a fulfilling meal for my carnivorous hubby, while keeping it light for me.
I have two main tricks when I want to keep it vegetarian, but filling. The first, starch/carbs. When trying to sell people who love meat on a dish that has none, you have to make sure it’s filling. Potatoes, rices, pastas and breads are the key to this. *Remember that starches/carbs aren’t bad for you. The type and amount we eat can be, though, so starch and carb responsibly.
The second trick I have is to use veggies that somewhat mimic the consistency and, sometimes, the flavor of meat, like mushrooms or asparagus. I find that mushrooms especially are a good substitute for meat. Not only are they thick and hearty, but they can have a great flavor, and can be given great flavor. Asparagus has a dense feel when cooked just right, and using the entire stalk, and not just the tips, can add a heftiness to your meal.
There is one last trick, but that’s just getting them to eat it without complaining. Good luck with that. I often do it by telling my husband we’re going to have one vegetarian dish a week. Usually, he’ll go along with it, and feel the better for it afterward, instead of stuffed and bloated. Just in case it doesn’t work, though, I keep a bag of pre-cooked grilled chicken strips in the freezer. My husband is a soldier, and for any men who have to physically exert themselves during the day, sometimes they need that extra protein boost.
So, let’s get to the food! This Orecchiette doesn’t have many ingredients, and this dish is easy to time so you have everything done at once. This, though, is one of those recipes where it’s worth it to have everything fresh (except the pasta, which can be dry.)
Ingredients:
- Orecchiette
- Fresh Asparagus
- Mushrooms, med dice or sliced
- Butter
- Flour
- Cherry Tomatoes
- Baby Spinach
- Freshly Grated Parmesan Cheese
- Fresh Basil
- Salt, Pepper & olive oil (can use veggie, grape seed or canola also)
You will notice that I haven’t given any amounts to use of these ingredients. It really depends on how many people you are going to serve, and what you like. I like to have equal parts veggies to pasta. For 2 people, I use the appropriate amount of pasta according to the package. For the veggies, I used about 1 cup of each, asparagus, mushrooms and cherry tomatoes, then, 1/2 C baby spinach and a few roughly chopped basil leaves for garnish.
- Preheat oven to 425˚ F. Heat a pot of water to boiling.
- Prep Asparagus and cut into 1 inch pieces.Cut tomatoes in half. place in a mixing bowl and drizzle with oil. Sprinkle with salt and pepper. I like to use a coarse grind like kosher or sea salt and a large grind of pepper. Toss veggies and pour onto a sheet pan. I always line it with nonstick foil, but it’s not necessary.
- Drizzle butter over mushrooms. Toss and sprinkle with salt and pepper. Toss in a few TBSP of flour. Add to sheet pan of veggies and bake for 12 minutes in oven.
- Once water comes to a boil, add salt to the water. The water should be salty to the taste, but, remember, this is going to soak into the pasta. I use about 1 TBSP of kosher salt to 3-4 C water. Add the pasta and boil for about 12 minutes, stirring occasionally to prevent sticking and encourage even cooking. Test a few pieces by tasting them. This is a thick pasta, but should not have a hard, raw feel.
- While everything is cooking, slice your spinach into slivers (or ribbons) and set aside.
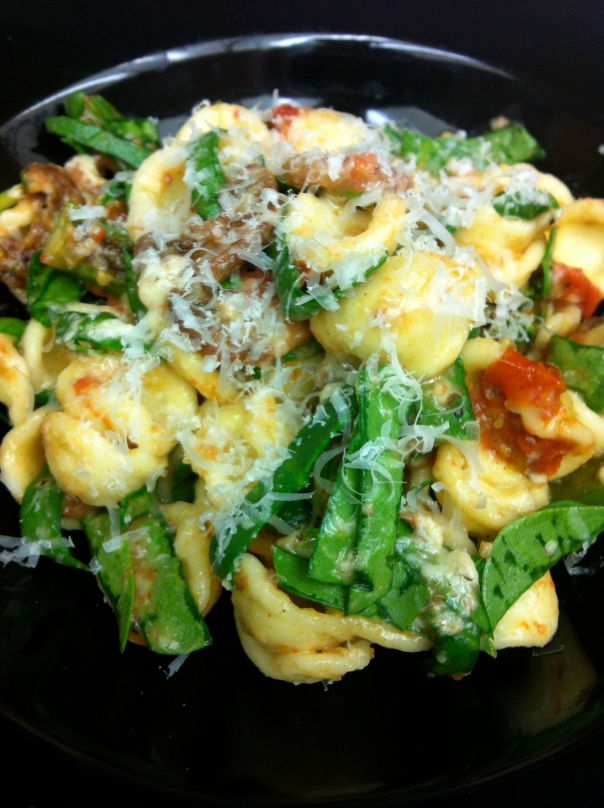
- When pasta is finished, drain and put in mixing bowl. Add spinach and toss. Add veggies to pasta and toss. Serve and top with grated Parmesan and basil.
For those of you who are desperate for the meaty addition, try this with grilled chicken chunks. It makes it super easy to get the pre-cooked pack of grilled chicken strips at the grocery store, and toss them into the oven as the same time as the veggies. Heat thoroughly, chop them in bite-sized pieces and toss them into the pasta. ENJOY!
Do It Yourself- Fudge Sauce
HOMEMADE FUDGE SAUCE
I have this game on my laptop called Chocolatier: Decadence By Design. (Yes, even my games often revolve around food and wine.) One aspect of the game is that you’re traveling around the world gathering ingredients so you can take them to a test kitchen and creating new products. At one point in the game, you get to make chocolate sauces. Well, it got me thinking, how would I even go about making a chocolate sauce? I’ve made berry sauces and wine sauces and gravies, but, surely, it can’t be that simple, can it?
I checked out several recipes for homemade fudge sauce, added my own twist, and came up with this super smooth, creamy and fudgey sauce that will have you making it for yourself and bottling it for your friends. It’s that quick and that easy! The best part is, you probably have everything you need in your pantry.
Try this sauce on strawberries, between cake layers, on ice cream, drizzled over doughnuts, in coffee, or in any of those, cravingly unhealthy ways we sometimes do, like with salt & vinegar chips or cheddar cheese cubes.
Let’s get started!
Ingredients:
- 1 C Milk
- 1 C Sugar (plain, white)
- 1/3 C Cocoa Powder
- 2 TBSP Flour
- 2 TBSP Butter
- 1 TBSP Vanilla
- 1 TBSP Instant Coffee (gives a whole new depth to the chocolate flavor)
- Pinch Table Salt
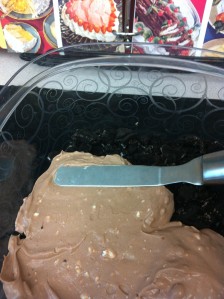
Mix everything, except the vanilla, together in a small pot or saucepan. Heat on med-high until boiling, stirring continually. Once it boils, turn down to medium and continue stirring until it thickens. Once it reaches that fudge sauce consistency and begins to thicken and coat a spoon, about 3-5 minutes, turn off the heat and stir in the vanilla.
All done! Use it immediately or allow it to cool slightly and store it in an airtight container in the fridge. A great thing about this sauce is that it only takes about 15 minutes, so you can whip it up easily before your craving goes away. It also makes the perfect amount so that you’re not burdened to use tons of it right away. You can use a tablespoon or two, and put it back in the fridge. It keeps really well for weeks in the fridge.
I hope you love this recipe. I know as I was making it, I kept smelling it and stirring it and watching it thicken up, and once I tasted it I knew I would never buy fudge sauce from the grocery again!
Super Simple General Tso’s Chicken
This recipe is way too easy not to try. You will make this once and it will become a staple and a simple go to. It doesn’t take a lot of time and it tastes delicious. This recipe is for 2 people. Let’s get to it!
Ingredients:
- 1- 12 oz bottle General Tso Sauce (Find it in the international food section of the grocery)
- 2 boneless, skinless Chicken Breasts, bite-sized cubes
- 1/4 C Peanut Oil, or any other cooking oil (not olive oil)
- 1 C Panko
- 1/2 C Green Onions, sliced
- 1/2 a Red Pepper, slice and chop into 1″ long strips
- 2 C White Rice, cooked
- *Optional- 2 C Broccoli, cooked (see recipe below)
Heat Oil in a pan. Sprinkle both sides of chicken pieces with salt and pepper. Toss chicken in Panko crumbs. Press the Panko into the chicken and coat it well. When the oil is hot, lay the chicken in the oil. Brown on both sides (be sure to cook through), and remove to drain.
Turn heat down to medium and make sure to remove oil from the pan. Put the chicken back in and pour entire bottle of sauce over chicken. Stir to coat chicken. Add pepper strips and green onions (and broccoli if using). Toss until heated through. Serve over over rice.
Was that easy or what?
Broccoli– I love to roast my broccoli. It produces so much more flavor than steaming or boiling. You can use either method you like. If you’re using frozen broccoli I don’t recommend roasting it. In that case, drop it into lightly salted boiling water for about 3 minutes, then drain it and add it to the chicken.
To roast it, preheat oven to 425˚F. Cut fresh broccoli into bite sized florets with short stalks. Drizzle with olive oil and sprinkle with salt and pepper. Toss to coat. Place on sheet pan and make sure they’re not overlapping. Bake 10 minutes and add directly to chicken or serve on the side. ENJOY!
Units of Measurement
So often I look at the ingredients in a recipe, and not the unit of measure associated with them. I find more often than not that I run into problems for one of 2 reasons. 1- the recipe is from the 90’s or before, when most things came in a can, and we weren’t so consumed with post-consumer recyclable materials. 2- I lived in Germany for a few years, and many of the recipes I collected there are in grams instead of cups. So, here’s a Cheat Sheet for some common units of measure you might see.
Tablespoon Conversions
- Dash = 1/16 tsp
- Pinch = 1/8 tsp
- 3 tsp = 1 TBSP
- 4 TBSP = 1/4 C
- 5 1/3 TBSP = 1/3 C
- 8 TBSP = 1/2 C
- 10 2/3 TBSP = 2/3 C
- 12 TBSP = 3/4 C
- 16 TBSP = 1 C
Liquid Measures
- 1 TBSP = 1/2 oz
- 1 C = 1/2 pt = 8 oz
- 2 C = 1 pt = 16 oz
- 4 C = 2 pt = 1 qt = 32 oz
- 16 C = 4 qt = 1 gal = 128 oz
Metric Conversions
Temperatures
- 300˚ F = 150˚ C = Gas 2 (very low)
- 325˚ F = 160˚ C = Gas 3 (low)
- 350˚ F = 180˚ C = Gas 4 (medium)
- 375˚ F = 190˚ C = Gas 5 (medium)
- 400˚ F = 200˚ C = Gas 6 (hot)
- 425˚ F = 220˚ C = Gas 7 (hot)
- 450˚ F = 230˚ C = Gas 8 (very hot)
- 475˚ F = 240˚ C = Gas 9 (very hot)
- 500˚ F = 260˚ C = Gas 10 (extremely hot)
- Broil F = Broil C = Gas Grill
Weights
- 1/2 oz = 15 g
- 1 oz = 25-30 g
- 4 oz = 1/4 lb = 115-125 g
- 8 oz = 1/2 lb = 225-250 g
- 16 oz = 1 lb = 450-500 g
- 1 1/4 lbs = 625 g
- 1 1/2 lbs = 750 g
- 2-2 1/4 lbs = 1,000g or 1 kg
US to Standard Metric
- 1/8 tsp = 0.5 ml
- 1/4 tsp = 1 ml
- 1/2 tsp = 2 ml
- 1 tsp = 5 ml
- 1 TBSP = 15 ml
- 2 TBSP = 25 ml
- 1/4 C = 2 fl oz = 50 ml
- 1/3 C = 3 fl oz = 75 ml
- 1/2 C = 4 fl oz = 125 ml
- 2/3 C = 5 fl oz = 150 ml
- 3/4 C = 5 fl oz = 250 ml
- 1 C = 8 fl oz = 250 ml
- 2 C = 1 pt = 500 ml
- 1 qt = 1 L
Bread Bowls Pt. 3- Shrimp Bisque

For this bread bowl, I used whatever they had at the grocery that was the right size and shape. This bread was much softer than the sourdough I used before, but, by using the oven technique, the toasting on the outside and inside helped firm up the bowl. It was also easier to eat the bowl afterward, using a softer bread.
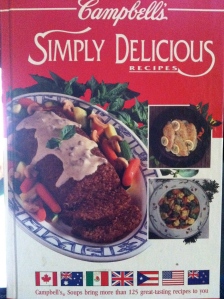
Shrimp Bisque was the first bisque I ever learned how to make. I wanted to make something with seafood that I’d never made before. I started combing every recipe book I owned from Giada, Tyler, Ina, Betty Crocker, Better Homes…. Finally, I came to a book I’d never opened before. You have those. The ones you thought were a good idea at the time, but never used, or the one someone who thought they knew you bought for you, and you looked at it and said, “I would never make any of this,” or the one you flip threw and swear you’ll cook from, but never get around to that book. Well, this one came from a 1992 Campbell’s recipe book.
Any recipe book can be helpful to have around. My favorite thing about cookbooks is that they’re great inspiration to find a good idea, or an awesome recipe, then create shortcakes or tweek it to your own personal tastes. Even if you don’t find a recipe in a particular book, it can always give you ideas for creating your own unique meal. I love looking at books and saying, “I don’t have that ingredient, but, OH, I have this and it’d be great!”
The original recipe for this bisque is very good. Of course, I change it up slightly. It calls for fresh parsley, which I never use. Where I live, it’s just to hard to find some fresh herbs in our commissary. You can use dried parsley for garnishing if you’d like, but it’s good either way.
It also calls for a can of condensed chicken broth, but I use homemade broth or the regular boxed broth I normally use. It’s whatever I have on hand. I always have the bouillon cubes, and now they have small packets of condensed stock. Any of that will work.
The thing I like best about this recipe is that it has a chicken broth base, not a tomato base. I have made tomato based bisques before, but, like caramel, they frighten me. Hahaha, I don’t know why. Some things, no matter how good they are or how well they turn out, they strike a fewar in me that won’t go away. Tomato based bisques are one of these things. Maybe it’s because I’m so used to whipping up sauces, gravies and soups with beef or chicken, or even fish bases.In any event, this bisque has been a hit with anyone I’ve served it to. Even my mother-in-law, who, when I told her what was for dinner turned to me and said, “Well, I’m not really a bisque person. I’ll just try a small bowl.” She had two.
This is my take on the “Creamy Shrimp Bisque” recipe from my Campbell’s recipe book. It makes about 4 cups of bisque.
Ingredients
- 4 TBSP Butter
- 1 C Mushrooms, sliced (any will do)
- 1 C Green Onions, sliced
- 2 Cloves Garlic, minced
- 1 lb shrimp, raw, deveined, shelled (I also remove the tails. It’s a pet peeve of mine)
- 2-3 C Chicken Broth
- 1/4 C Flour
- 1/2 C Milk or light cream
- 1/3 C Dry White Wine
- *Optional- 2 tsp Crushed Red Pepper Flakes, more or less to your heat’s desire
Start by melting 3 TBSP of butter in a medium pot. Once melted, add mushrooms, 1/2 C of the green onions, *crushed red pepper flakes and garlic and cook on med/med-low until they begin to soften. You don’t want the onions or garlic to brown because it changes the flavor and you’re going for a fresh and light taste to this bisque.
Once the veggies have softened, add the chicken broth and shrimp and bring the pot to a boil. It doesn’t take long for shrimp to cook, so keep an eye on it. Your pot and it’s contents are already hot, so it will come to a boil quickly. (I mentioned earlier that I take the tails off my shrimp. It’s easiest to do this if you let the frozen shrimp sit in cold water for about 20 minutes, or let them sit on the counter for about 30-40 minutes. They will still be cold, but this will remove any ice and make things easier. Grab the body of the shrimp in one hand and gently tug. With the other hand, grip the very bottom of the tail above the two tiny fins at the end. Pinch and pull in the opposite direction of the body. The tail should slide right off. It just annoys me to have dishes hampered by having to stop and separate the tail when you’re trying to enjoy a dish.)
While your shrimp cook, combine the flour and cream into a mixing bowl and whisk until combined. Pour directly into your pot as soon as your shrimp begins boiling and stir. This thickens your bisque. Bring it back up to a boil, then, reduce it to a simmer.
Add the wine, last TBSP of butter and other 1/4 C of green onions. Stir until the bisque is heated through. Remove from heat and serve, garnishing with the remaining 1/4 C green onions.
I also like to garnish with some grated Parmesan cheese and crushed red pepper flakes (if I didn’t put many in already.) You can also use the original recipe’s parsley. This recipe is perfect as a cold winter day warmer, or a fresh, clean, summer day seafood starter or quick, light lunch. Either way, the key to this recipe is to have everything chopped or sliced or poured into a prep dish, so all you have to do is dump it into the pot when the time comes. It truly makes this soup a 15 minute or less meal.
Try it with fresh jumbo shrimp and garnish with fresh herbs.
Bread Bowls Pt. 2- Chicken Bisque with Mushrooms and Spinach
Now that we have made a bread bowl, what do we put in it? Many soups and stews are perfect for your bread bowls. Any stew is perfect for this vessel, but I have my favorites.I prefer a nice creamy bisque. Here are two of my favorite fillings for my bread bowls.
The first is one I came up with the other night. My husband wanted something with chicken, and I had two loaves of bread I needed to use. I really wanted something I could put in a bread bowl. I also had mushrooms I needed to use, and I wanted to find some way to get some veggies into it, without making chicken and broccoli soup.
At its most basic, a bisque is a creamy soup. It’s French in origin, and is usually made from fish or shellfish, meat, or pureed veggies. I usually start mine all the same way, with a gravy base. Here’s how it’s done:
Ingredients:
2 Boneless, Skinless Chicken Breasts (Use 1 per person)
2 TBSP Olive Oil
8 TBSP Butter
1/2 C + 1 TBSP Flour
4-6 C Chicken Broth
2 TBSP Cream or Milk
1/2 C Mushrooms, chopped
1 1/2 C Baby Spinach, chiffonade cut
Salt and Pepper to taste
Green Onions for garnish
Heat the olive oil in a large saucepan. Slice both chicken breasts as if to butterfly them, but cut them completely in half. Salt and pepper both sides of the 4 pieces. Place chicken in the saucepan. Once brown, flip and allow the other side to brown. Remove and set aside.
Melt 4 TBSP of butter in the same saucepan, whisking any brown bits off the bottom. Add flour and whisk until combined. Cook for about a minute to remove the raw flour taste. Slowly whisk in the chicken broth, beginning with 2 cups and slowly adding more until the desired consistency is reached. Bring to a boil, then, reduce to a simmer. Add salt and pepper to taste. Stir in cream and 2 TBSP butter to finish.
In a small pan, heat 2 TBSP butter until melted. Once hot, toss in mushrooms and sprinkle a TBSP of flour on top. Stir to coat and allow mushrooms to brown. Add to bisque.
Chop chicken in bite size pieces and add to bisque. Add spinach and stir gently. Allow to simmer for 5 minutes and serve. Top with chopped green onions.


