Monthly Archives: April 2012
THANKS TO ALL OF YOU!!!
YAY! Today we finally broke 1,000 hits on AudreyCooksStuff. I just want to thank all of you for supporting me these past few months. Since I started this site, I’ve realized the deep passion I have for food, as well as others who have motivated me to dig deeper and do more than I thought possible. Happily, this blog has become more than a hobby to me, and I would like to thank all of you who follow my blog, who have left comments and “liked” articles, who have visited my page singularly or regularly, and especially those who have tried my recipes.
I hope to bring you many more delicious recipes and great treats. Please, keep your comments coming, and thank you again.
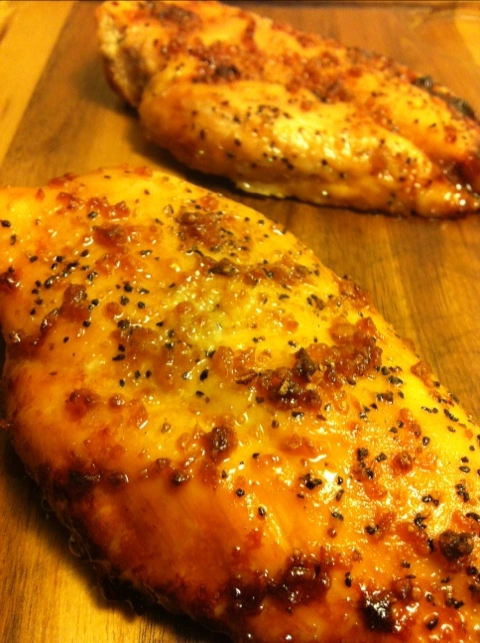
Sweet Garlic Chicken
I can’t tell you how many times I’ve pulled a few chicken breasts out of the freezer and thought to myself, “Hmmmm, what to do with you?” I find that ground beef and chicken are two staples of the average diet that are the most difficult to dress up at times, and many of us often get stuck in a rut of preparing them the same way.
While perusing Pinterest a little while ago, I came upon this recipe that a friend of mine posted. The original recipe can be found at http://www.food.com/recipe/easy-garlic-chicken-5478. I changed it up only slightly. I didn’t take many pics, but there aren’t many steps that need visual explanation. Here’s what to do:
Ingredients:
- 2 Chicken Breasts
- 1/2 tsp each Salt & Pepper
- 2 TBSP Olive Oil + more for drizzling
- 3 Cloves Garlic, minced
- 2 TBSP Brown Sugar
Preheat oven to 450˚ F.
Place chicken breasts in baking dish. (I advise using nonstick foil. Once this is cooked, there is a lot of mess leftover. It just makes cleanup easier.) Drizzle lightly with olive oil and sprinkle both sides with salt and pepper.
In a saucepan, heat 2 TBSP olive oil over medium heat. Add minced garlic to heated oil. Cook until softened, about 2 minutes. Turn off the heat and add the brown sugar. Stirring until combined. Spread the brown sugar mixture evenly over each piece of the side that is facing up.
When oven is heated, bake chicken for 15-20 minutes. Remove and serve.
If feeding more than two people, I would use 1 TBSP Olive Oil and 1 TBSP Brown Sugar per breast, and garlic to taste. Enjoy!
Goat Cheese and Apple Tarts
Now, ya’ll know I’m all about easy, and I’m definitely about quick. Enter: Goat Cheese and Apple Tarts. With only a few ingredients and a time of under 30 minutes, you will be making these for parties, or as a snack for yourself! I’m not even going to talk about them anymore, because once you make them, you will make them over and over and over again. Here’s how to do it:
Ingredients:
- 1 package Puff Pastry Shells
- 1- 4 oz package Plain Goat Cheese, softened
- 1/2 Lemon, juiced
- 1 tsp Lemon Zest (fresh is best)
- 1 1/2 TBSP Powdered Sugar
- 1/2 C Apple Pie Filling (slices or chopped, either is fine)
- 1-2 TBSP Brown Sugar or Raw Sugar for sprinkling (optional)
Preheat your oven to 425˚ F.
Unwrap your pastry shells and place them on a sheet tray. You can lay down parchment paper, nonstick foil, or just use some nonstick spray. Once your oven is ready, bake the shells for 10 minutes, just until the pastry puffs up and begins browning around the edges.
While your pastry is baking, put your goat cheese in a bowl. Cheese should be at room temperature. Add about 1 tsp of the zest and the juice from half the lemon. Whisk until it’s all combined. Add powdered sugar and whisk until smooth and creamy. Be sure to taste it. Some lemons are sweeter than others and it may require some adjusting.

This little piece in the middle is what you'll be removing. It will peel off easily as the pastry is so flaky. Just remember to cook it first, otherwise it'll be very difficult to pop out.
Once your shells are finished, remove them and give them about 5 minutes to cool, or at least until you can handle them. There is a small insert in the shell. Use a fork to pull it out. You can toss it, or leave it to the side on the tray and continue to cook it. Scoop a dollop of the cheese mixture into the shell and spread it around.

Fill the shells about to the rim.
Take a scoop of apples and place a spoonful on top of the cheese. If using slices, cut them to the size of the inside of the shell and lay them on top or chop them. Taste your apple filling to judge the tartness. I like to sprinkle just a little raw sugar or brown sugar on top. Whatever you have is fine. It just bakes down into the apples.
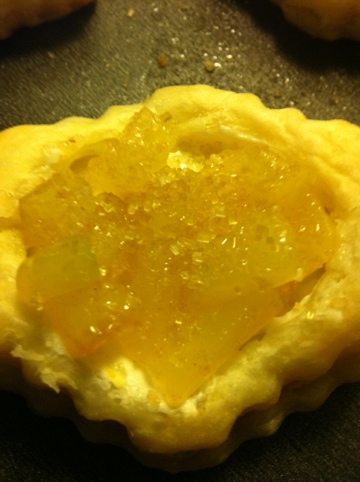
The molasses taste of the brown sugar, or, in this case, raw sugar, will give the apples that much more flavor and ease some of the tartness.
Pop the tray of tarts back into the oven and bake for another 10 minutes or until the shells are a golden brown. You can serve these warm, at room temp, or cool out of the fridge. You can make them ahead of time and chill them overnight. Just be sure the pastry is still flaky. You can always heat the in the oven on low (170-225˚ F) for about 5-10 minutes just to refresh them if need be.
I really hope you try these. They are so fresh and yummy. They are just perfect for breakfast, brunch, dessert, coffee and tea, or wine, with the girls (or guys). They’re also a great quick snack, and very satisfying. It’s the perfect treat to make when you have leftover apples, or a spare can of apple pie filling.ENJOY!
Artisan Bread at Home
I follow several food blogs. Sadly, most of the time, I see things I would never make. Either I’m just not interested or I look at the ingredients and directions and say, “Ok, I’ll just have to take your word for it.” This morning I was up early. My AC is broken, ugh. Did I mention I live in the desert and it was 91 degrees today? So, at 6:30 AM, I woke up to 75 degrees, bright sunshine, and a slew of e-mails. One such e-mail was a new blog from http://littleoventhatcould.wordpress.com/2012/04/19/artisanbrea/. The blog features a too-good-to-be-true homemade artisan bread. It is quite literally the easiest bread with the fewest ingredients I’ve ever seen… and now, made. The original posting came from http://simplysogood.blogspot.ca/2010/03/crusty-bread.html, which is a pretty great food blog as well. Apparently it was taken from Le Creuset. All credit being given, I made two different loafs, both using almost the same ingredients, and both producing delicious results.
Ingredients:
3 C White Bread Flour
2 TBSP Kosher Salt
1/2 tsp yeast
2 C Water
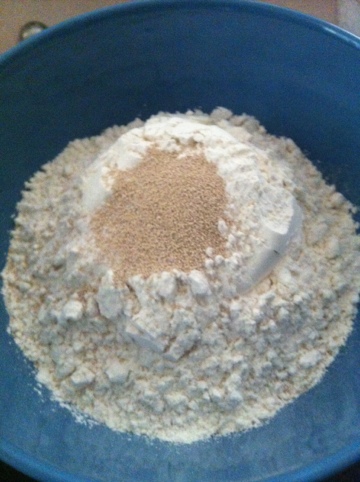
Put the flour into a deep mixing bowl. Add salt and yeast and whisk. Add water and stir. You don’t want to use a mixer with a dough hook because this dough is WAY too sticky.

Once dough is mixed, it will be very sticky and lumpy. Cover the top with plastic wrap and allow it to sit in a warm place for 12 hours, or until it has risen and doubled in size.
Once your dough has risen, preheat your oven to 450 degrees F. Once it’s ready, put the lid on your Dutch oven and put it in the oven, empty, for 30 minutes.
Dump your bread out onto a heavily floured surface. I followed the advice of the other blog and used a flour sack towel. It made everything easier. Shape the dough into a ball without kneading it, and cover the dough with the plastic wrap again and allow it to rest.

Once the pot has been heated, remove the lid and carefully place the rested ball of dough inside. Flour your hands well prior to handling the dough. It makes things easier. You don’t need to
Put any oil or nonstick spray in the pot. The bread will lift straight out. Return the lid and bake for 30 minutes.

Tahdah! Okay, so I pulled this out about 7 minutes early. It smelled so good, I couldn’t help it. It was cooked all the way through, but, it didn’t fully get that deep golden brown color. I assure you, it tastes amazing!
Now, the other recipe is very similar and merely substitutes All-Purpose flour for the bread flour and uses 1 1/2 tsp salt and 1 1/2 C water. Use the same amount of yeast. Everything else is the same.
I will say this, look in on your bread on occasion. If you are familiar with bread baking, you’ll know when it’s risen enough. Now, like I said earlier, my AC is currently out, and it’s 80+ degrees in here. My dough was ready to go in about 8 hours.
Make this and ENJOY!
My second one turned out like so:
Fresh Garlic Tomato Sauce
I have recently been on a search for 2 things. The first is a way to use more of my fresh herbs. If you’re a regular follower, you’ll remember a little herb garden I started a few weeks ago. I’m happy to report that, so far, everything seems to be handling the heat well. Everything except my Greek Basil, which keeps drying on the edges. Bygones.
The second is a fresh, rich tomato sauce. I’ve tried before to make homemade sauce, and it never came out right. Well, I’ve finally figured it out. Turns out you don’t have to simmer it all day long and you can use canned tomatoes. The best part, this sauce is garlicky enough that lovers will be satisfied, but not so much so that you’ll reek of it. Here’s how to do it:
Ingredients:
1- 28 oz can crushed San Marzano tomatoes
2 TBSP Tomato Paste
2/3 C Dry Red Wine
Basil, Oregano, Italian Flat Leaf Parsley, Rosemary (I used fresh herbs. You can see how much below, but if you’re using dry herbs, you’ll want to use less)
5 cloves Garlic, minced
1 TBSP Balsamic Vinegar
Salt and pepper to taste
Extra Virgin Olive Oil for drizzling
Empty can of tomatoes into a pot and cook over medium heat. Stir in tomato paste. Add red wine and stir. Chop the herbs well and add them to the sauce along with the balsamic.
Simmer for at least 15 minutes, however, the longer you allow it to simmer, the more concentrated the flavors will become. I made the sauce, then, allowed it to simmer while I made the meat and pasta.
Serve with or without meat. Garnish with a sprinkle with your favorite cheese, a drizzle olive oil, and sprig of basil. You can also garnish with a dash of dry basil or balsamic.
Whether or not you add meat, this is a no fail sauce that will tickle your garlic fancy and make you seem like a rock star, and no one needs to know how simple it was. ENJOY!
Buttery Carrot Mashed Potatoes
Okay, does anything say comfort food like mashed potatoes? Not for me! I love potatoes, but mashed potatoes are definitely my favorite. There’s nothing better than the creamy, buttery smoothness of a good mash. They are the perfect accompaniment to almost any meal, be it chicken, fish, meat or veg and can be dressed with any sauce.
We’re all familiar with the various herb mash concoctions, garlic and rosemary, brown butter and sage, cheddar and chive, mushroom and onion, the list goes on and on and I have tried them all. But what about the other veggie combos? Mashing your potatoes with other veggies is all the rave, and I am on the rave train! Now, I’ve been mixing my peas and corn with my mashed potatoes since I was a kid. It was pretty much the only way I would eat my veggies. Brussel sprouts… yuck! Brussel sprouts with mashed potatoes… edible! Hahaha. So, I started with a potato and parsnip mash-up. This was the first time I’d ever had parsnips, and the first time I attempted a mash like this. I chopped up the parsnips and potatoes in similar cubes and boiled them together. The floral note in the parsnips was so unexpected, and added a new depth to my potatoes. I made these about 5 more times before my husband finally requested something else. But what?
Well, I see lots of cooking shows where they make a cauliflower and potato mash and everyone’s loving it. I tried it. Delectable… aka, the only way I can get my hubby to eat cauliflower. Awesome, I’ve now used two different veggies in my potatoes. What’s next? Enter: Anne Burrell. I was watching “Worst Cooks in America” and saw a carrot potato mash Chef Burrell made. The problem, they didn’t show how to make it, and I couldn’t find her recipe anywhere online. Not to worry. I’m sure I can figure this out. And I did! Here’s how:
Ingredients:
- Potatoes, peeled and cubed (1 per person)
- Carrots, peeled and cubed (1 per person)
- Buttermilk (or cream or milk as you like)
- Butter
- Salt
Make sure your carrots and potatoes are cut into equal sized cubes. Put in a pot of salted water and turn on high to boil. Boil until both potatoes and carrots are fork tender. Be sure to use a fork, not a knife.

 Once fork tender, strain out the water and add butter before mashing your potatoes as usual. I like using my food pro, for super creamy potatoes, but you can use a stand mixer, hand blender, hand masher, whatever works for you. Add enough buttermilk (or cream or milk) to make your potatoes creamy and smooth, but not runny or soupy. Add slowly and in small amounts at a time. If you add too much liquid, return to your pot and heat over med-low, stirring constantly.
Now, enjoy your potatoes! They are the perfect compliment to any main. Also, I’ve eaten them for dinner when I’m flying solo. They’re just that good!
Hasselback Potatoes
My husband loves baked potatoes. I love potatoes in general, but I like to do different things with them. I made BBQ ribs for dinner, and wanted to make potatoes, but I knew my hubby would ask for baked potatoes. Ugh, not again!
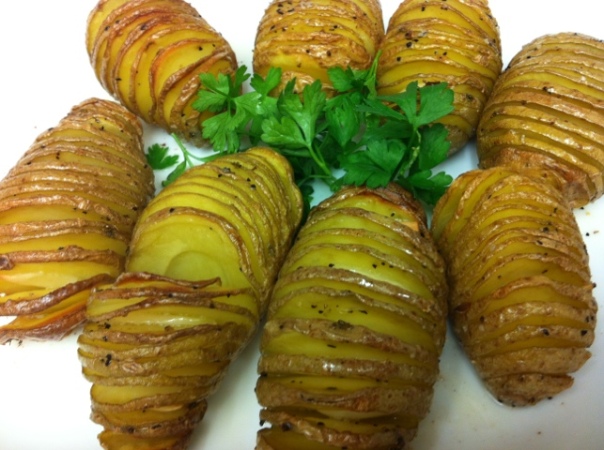
Then, I remembered the time we spent in Europe and a potato there called the Hasselback Potato. These potatoes originated in Stockholm, Sweden. They are super simple, look super fancy, and taste super yummy. Here’s what you need.
Ingredients
Potatoes
Olive Oil
Butter
Salt and pepper
Preheat your oven to 425 degrees F.
You can use any potato you wish. Use a large baking potato, red potatoes, baby new potatoes, Idaho potatoes, anything works for this recipe. I used Baby New potatoes this time just because they are starting to get a little soft so I wanted to use them up. I left mine with the peel on, but you can peel it if you like.
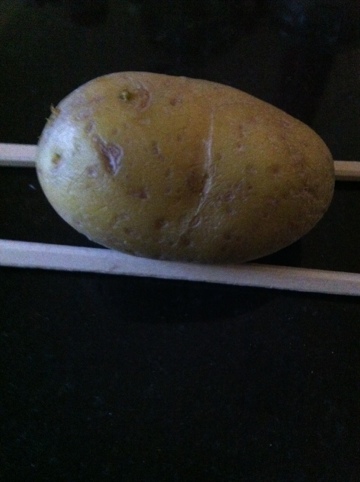
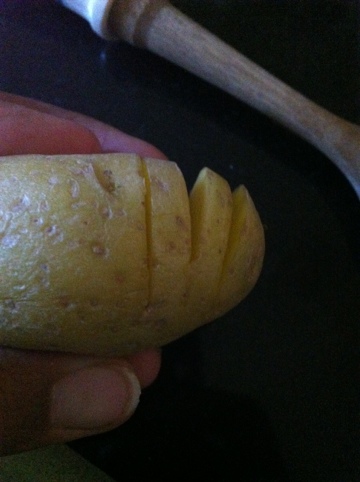
To get the amazing cut this potato is known for, you can do a few things. Some people use chop sticks on either side of the potato and slice down to the stick. It keeps you from cutting through the potato completely.
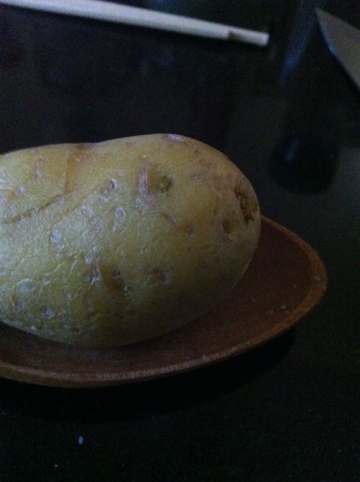
My favorite is to place your potato in the bowl of a wooden spoon. Slice down to the spoon. I think the potato stays in the spoon better, especially when you are using smaller potatoes.
Either way, you’re looking for a potato that isn’t sliced all the way through. Be sure on the very ends, you don’t slice too far as it may not reach the guide you’re using.
I happen to love garlic. This is optional, but if you want to use garlic, slice a few cloves and insert a few slices per potato into your cuts.
Melt a few tablespoons of butter and whisk with a few tablespoons of olive oil. Brush, toss or drizzle over potatoes. Sprinkle with salt and pepper. Place potatoes on a baking sheet and bake for one hour. Remove and serve. You can brush again with butter, top with sour cream or butter, sprinkle with fresh herbs.
OPTIONS
-Bake for 45 minutes, top potatoes with a mixture of breadcrumbs and butter. Bale for remaining 15 minutes, until breadcrumbs are golden brown and crispy.
-Mix 1/2 C sour cream with 2 TBSP fresh parsley, 1 tsp garlic powder an a dash of salt and pepper. Make ahead of time and refrigerate. Top potatoes before serving.
-Top potatoes straight out of the oven with freshly grated Parmesan or Cheddar cheese and sprinkle with bacon and chives.
ENJOY!!!
Creamy Shrimp Bisque
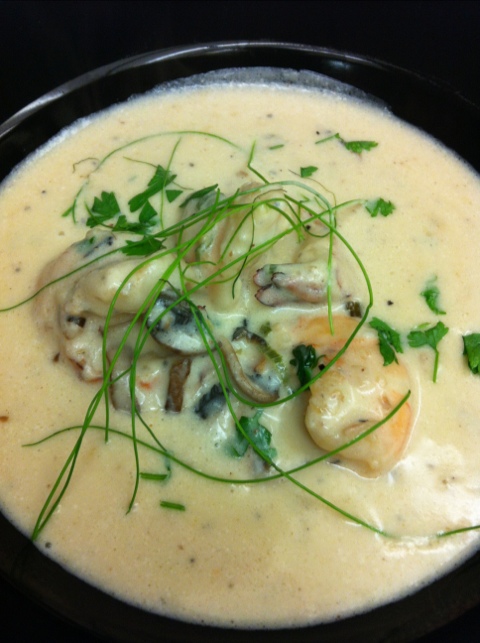
When I first posted this recipe, I made it in a bread bowl. The other night, I had a serious craving for this bisque. I was able to find some beautiful jumbo farm raised shrimp in the shell, but, no bread bowl. Guess I got there too late; the bakery was wiped out. No matter! I can have it in a regular bowl just as well as a bread bowl.
I also looked at a few different ways to make it. Same basic recipe, but I made a few tweeks. I like using corn starch much more than flour.
Ingredients
- 4 TBSP Butter
- 1 C Mushrooms, sliced (any will do)
- 1/2 C Green Onions, sliced
- 2 Cloves Garlic, minced
- 1 lb shrimp, raw, deveined, peeled (I also remove the tails. It’s a pet peeve of mine)
- 2-3 C Chicken Broth
- 3 TBSP Corn Starch
- 1/2 C Milk or Heavy Cream (I prefer cream)
- 1/3 C Dry White Wine
- Parsley and Chives for garnish
- *Optional- 2 tsp Crushed Red Pepper Flakes, more or less to your heat’s desire
Start by melting 3 TBSP of butter in a medium pot. Once melted, add mushrooms, green onions, *crushed red pepper flakes and garlic and cook on med/med-low until they begin to soften. You don’t want the onions or garlic to brown because it changes the flavor and you’re going for a fresh and light taste to this bisque.
Once the veggies have softened, add the chicken broth, wine and shrimp and bring the pot to a boil. It doesn’t take long for shrimp to cook, so keep an eye on it. If you are using jumbo shrimp and they are half in and half out of the soup, you may want to turn them to make sure it cooks evenly. Your pot and it’s contents are already hot, so it will come to a boil quickly.
While your bisque comes to a boil, combine the flour and cream into a mixing bowl and whisk until combined. Pour directly into your pot as soon as your shrimp begins boiling and stir. This thickens your bisque. Bring it back up to a boil, then, reduce it to a simmer.
Add the last TBSP of butter. Stir until the bisque is heated through. Allow the bisque to thicken, then remove from heat and serve, garnishing with the roughly chopped parsley and chives.
Caramel Swirl Soy Ice Cream
Who doesn’t love ice cream? The smooth, creamy taste of whichever flavor you choose to indulge in. With so many ice cream shops offering a never ending range flavor creations, the combinations can be unending.
I have a really good friend who also loves Ice cream. Problem is, her whole family is lactose intolerant. Now, I can’t imagine ever having to give up whole milk, but, I took on the challenge of creating some really good soy ice cream for her family. Here’s what I did:
Ingredients:
2 C Vanilla Silk (milk)
4 Egg Yolks
1 1/2 tsp Corn Starch
1 C Powdered Sugar
1 tsp Vanilla
Heat the milk over a medium heat. Keep an eye on it. You want to heat it until bubbles begin forming on the sides. It doesn’t need to come to a boil.
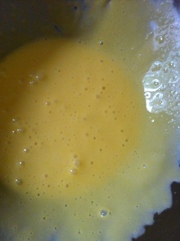
While your milk is heating, whisk egg yolks in a mixing bowl. I like for them to get a little lighter in color.
Dump in your corn starch and powdered sugar. Whisk until it becomes smooth and liquidy. Don’t freak out if it clumps up instantly.
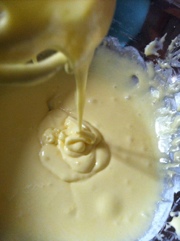
It’s ok. It will all incorporate if you keep whisking. Doesn’t take long, about 30-45 seconds at most and you’re ready to rock.
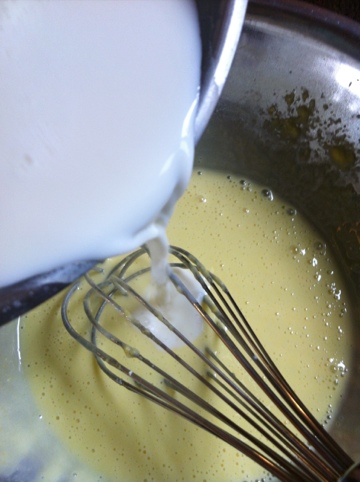
Once your milk gets little bubbles around the outside, it’s time to temper your egg mixture. (If it boils over, you can still use it as long as it doesn’t taste burned and you didn’t lose too much. Just let it cool a bit and taste it. ) You can do this a few ways. The simplest is to use a ladle. Take a ladle full of hot milk and very slowly add it to your egg mixture, being sure to whisk while adding the milk. Tempering raises the temperature of your eggs without cooking them.
Add another ladle of milk, or about 1/3 of the pot, and whisk well. Pour the egg mixture back into the hot milk, whisking to incorporate. Return the heat to medium and stir with a wooden spoon or heat proof spatula. Let the mixture thicken until it coats the back of your spoon. You should be able to run your finger down the middle of the spoon.
Yep! It’s done. Now, pour it through a sieve to make sure you don’t have any strange clumps in your ice cream. Stir in the vanilla. Pour it into a freezable container with a lid or cover a container with plastic wrap. Put in the freezer for 2-3 hours to chill.
I’ve found that ice cream made with milk will churn better with less freezing time than ice cream with soy.
** Now for the caramel part! Use your own caramel recipe, or check out my simple recipe. You can also use a premade sauce. If you make it yourself, give it time to cool to at least room temp.
Once you notice your ice cream Is sufficiently chilled, at least 40 degrees F, pour it into your ice cream maker and follow the manufacturer’s directions. Once it’s finished churning, return it to the freezer in a container and add the caramel. Pour it over the top of the ice cream, and gently stir through with a spoon. You don’t want to blend them, just swirl it through. item it in the freezer until sufficiently frozen, at least 1-2 hours. Once it’s ready, top it with additional caramel sauce for a decadent dessert. Enjoy!!!
Creamy Caramel Sauce
Almost everyone has a favorite recipe for caramel. Whether it’s a sauce, candy, filling or garnish, we all have our go to. I usually use my grandmother’s recipe when I make popcorn balls. Delicious!
With the discovery of the homemade fudge sauce I recently posted, and the addition of the doughnuts I made and posted the other day, I got experimenting.
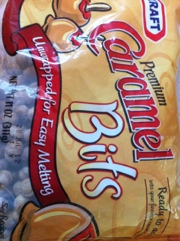
After a few trial and error modifications, mostly error… okay, all error, I Decided to clean my pantry. I seem to find a plethora of energy when I’m frustrated. So, cleaning commenced and what did I find? A few bags of caramel bits!
Yay! It was so obvious. Here I am, screwing up batch after batch, trying to be original, when it was here all the time. I’ve already made desserts with melted pre made caramel bits and heavy cream. Why wouldn’t that make a goo drizzle or sauce? And it did.
1/2 C Caramel Bits
1/3 C Heavy Cream
1 tsp Vanilla Extract
Heat caramel bits and cream in a pot over medium heat. It’s easy to want to turn the heat to high, but you won’t get an even melt and you’ll have lumpy sauce.
Once everything is melted and combined, remove it from the heat, stir in the vanilla, and allow it to cool about 15 minutes. Test the consistency. It may still be slightly warm, but should be smooth, creamy and melty. It should not be starting to form clumps. If that is the case, it’s time to put it back on the heat and add more cream. If you think it’s too thin, like milk or even water, back to the heat and slowly melt in more caramel bits.
In no time at all you’ll have the quickest caramel sauce you’ve ever made, and it’s so yummy! Who knew?! Enjoy this on doughnuts, I’ve cream, brownies, the list goes on.


