Blog Archives
Bread Bowls Pt. 3- Shrimp Bisque

For this bread bowl, I used whatever they had at the grocery that was the right size and shape. This bread was much softer than the sourdough I used before, but, by using the oven technique, the toasting on the outside and inside helped firm up the bowl. It was also easier to eat the bowl afterward, using a softer bread.
Shrimp Bisque was the first bisque I ever learned how to make. I wanted to make something with seafood that I’d never made before. I started combing every recipe book I owned from Giada, Tyler, Ina, Betty Crocker, Better Homes…. Finally, I came to a book I’d never opened before. You have those. The ones you thought were a good idea at the time, but never used, or the one someone who thought they knew you bought for you, and you looked at it and said, “I would never make any of this,” or the one you flip threw and swear you’ll cook from, but never get around to that book. Well, this one came from a 1992 Campbell’s recipe book.

Any recipe book can be helpful to have around. My favorite thing about cookbooks is that they’re great inspiration to find a good idea, or an awesome recipe, then create shortcakes or tweek it to your own personal tastes. Even if you don’t find a recipe in a particular book, it can always give you ideas for creating your own unique meal. I love looking at books and saying, “I don’t have that ingredient, but, OH, I have this and it’d be great!”
The original recipe for this bisque is very good. Of course, I change it up slightly. It calls for fresh parsley, which I never use. Where I live, it’s just to hard to find some fresh herbs in our commissary. You can use dried parsley for garnishing if you’d like, but it’s good either way.
It also calls for a can of condensed chicken broth, but I use homemade broth or the regular boxed broth I normally use. It’s whatever I have on hand. I always have the bouillon cubes, and now they have small packets of condensed stock. Any of that will work.
The thing I like best about this recipe is that it has a chicken broth base, not a tomato base. I have made tomato based bisques before, but, like caramel, they frighten me. Hahaha, I don’t know why. Some things, no matter how good they are or how well they turn out, they strike a fewar in me that won’t go away. Tomato based bisques are one of these things. Maybe it’s because I’m so used to whipping up sauces, gravies and soups with beef or chicken, or even fish bases.In any event, this bisque has been a hit with anyone I’ve served it to. Even my mother-in-law, who, when I told her what was for dinner turned to me and said, “Well, I’m not really a bisque person. I’ll just try a small bowl.” She had two.
This is my take on the “Creamy Shrimp Bisque” recipe from my Campbell’s recipe book. It makes about 4 cups of bisque.
Ingredients
- 4 TBSP Butter
- 1 C Mushrooms, sliced (any will do)
- 1 C Green Onions, sliced
- 2 Cloves Garlic, minced
- 1 lb shrimp, raw, deveined, shelled (I also remove the tails. It’s a pet peeve of mine)
- 2-3 C Chicken Broth
- 1/4 C Flour
- 1/2 C Milk or light cream
- 1/3 C Dry White Wine
- *Optional- 2 tsp Crushed Red Pepper Flakes, more or less to your heat’s desire
Start by melting 3 TBSP of butter in a medium pot. Once melted, add mushrooms, 1/2 C of the green onions, *crushed red pepper flakes and garlic and cook on med/med-low until they begin to soften. You don’t want the onions or garlic to brown because it changes the flavor and you’re going for a fresh and light taste to this bisque.
Once the veggies have softened, add the chicken broth and shrimp and bring the pot to a boil. It doesn’t take long for shrimp to cook, so keep an eye on it. Your pot and it’s contents are already hot, so it will come to a boil quickly. (I mentioned earlier that I take the tails off my shrimp. It’s easiest to do this if you let the frozen shrimp sit in cold water for about 20 minutes, or let them sit on the counter for about 30-40 minutes. They will still be cold, but this will remove any ice and make things easier. Grab the body of the shrimp in one hand and gently tug. With the other hand, grip the very bottom of the tail above the two tiny fins at the end. Pinch and pull in the opposite direction of the body. The tail should slide right off. It just annoys me to have dishes hampered by having to stop and separate the tail when you’re trying to enjoy a dish.)
While your shrimp cook, combine the flour and cream into a mixing bowl and whisk until combined. Pour directly into your pot as soon as your shrimp begins boiling and stir. This thickens your bisque. Bring it back up to a boil, then, reduce it to a simmer.
Add the wine, last TBSP of butter and other 1/4 C of green onions. Stir until the bisque is heated through. Remove from heat and serve, garnishing with the remaining 1/4 C green onions.
I also like to garnish with some grated Parmesan cheese and crushed red pepper flakes (if I didn’t put many in already.) You can also use the original recipe’s parsley. This recipe is perfect as a cold winter day warmer, or a fresh, clean, summer day seafood starter or quick, light lunch. Either way, the key to this recipe is to have everything chopped or sliced or poured into a prep dish, so all you have to do is dump it into the pot when the time comes. It truly makes this soup a 15 minute or less meal.
Try it with fresh jumbo shrimp and garnish with fresh herbs.


Bread Bowls Pt. 2- Chicken Bisque with Mushrooms and Spinach
Now that we have made a bread bowl, what do we put in it? Many soups and stews are perfect for your bread bowls. Any stew is perfect for this vessel, but I have my favorites.I prefer a nice creamy bisque. Here are two of my favorite fillings for my bread bowls.

The first is one I came up with the other night. My husband wanted something with chicken, and I had two loaves of bread I needed to use. I really wanted something I could put in a bread bowl. I also had mushrooms I needed to use, and I wanted to find some way to get some veggies into it, without making chicken and broccoli soup.
At its most basic, a bisque is a creamy soup. It’s French in origin, and is usually made from fish or shellfish, meat, or pureed veggies. I usually start mine all the same way, with a gravy base. Here’s how it’s done:
Ingredients:
2 Boneless, Skinless Chicken Breasts (Use 1 per person)
2 TBSP Olive Oil
8 TBSP Butter
1/2 C + 1 TBSP Flour
4-6 C Chicken Broth
2 TBSP Cream or Milk
1/2 C Mushrooms, chopped
1 1/2 C Baby Spinach, chiffonade cut
Salt and Pepper to taste
Green Onions for garnish
Heat the olive oil in a large saucepan. Slice both chicken breasts as if to butterfly them, but cut them completely in half. Salt and pepper both sides of the 4 pieces. Place chicken in the saucepan. Once brown, flip and allow the other side to brown. Remove and set aside.
Melt 4 TBSP of butter in the same saucepan, whisking any brown bits off the bottom. Add flour and whisk until combined. Cook for about a minute to remove the raw flour taste. Slowly whisk in the chicken broth, beginning with 2 cups and slowly adding more until the desired consistency is reached. Bring to a boil, then, reduce to a simmer. Add salt and pepper to taste. Stir in cream and 2 TBSP butter to finish.
In a small pan, heat 2 TBSP butter until melted. Once hot, toss in mushrooms and sprinkle a TBSP of flour on top. Stir to coat and allow mushrooms to brown. Add to bisque.
Chop chicken in bite size pieces and add to bisque. Add spinach and stir gently. Allow to simmer for 5 minutes and serve. Top with chopped green onions.
Bread Bowls Pt. 1

You can use bread bowls as great vessels for soups, stews, etc. The question is what kind of bread and how? Well, I have everything covered for you. First, let’s start with the bread.
You can use almost any type of bread for your bowl. My favorite is a sourdough loaf, pictured above. It’s best if the loaf is circular with a flat base. You also want bread that you enjoy eating, and that tastes good with the meal you are preparing. The base of the loaf should be about palm size or thereabout. Also, a bread with a firm outer crust works well to hold the contents and looks very nice.
Now that we have the bread we want to use, how do we prepare it? Here are the three easy steps to to preparing your loaf.
 Insert a sharp knife, I have a tomato knife i use specifically for this purpose, and cut beneath the top, following the natural curve of the bread. This loaf has a natural square top, so that’s how I cut it, but you can make your top circular as well.
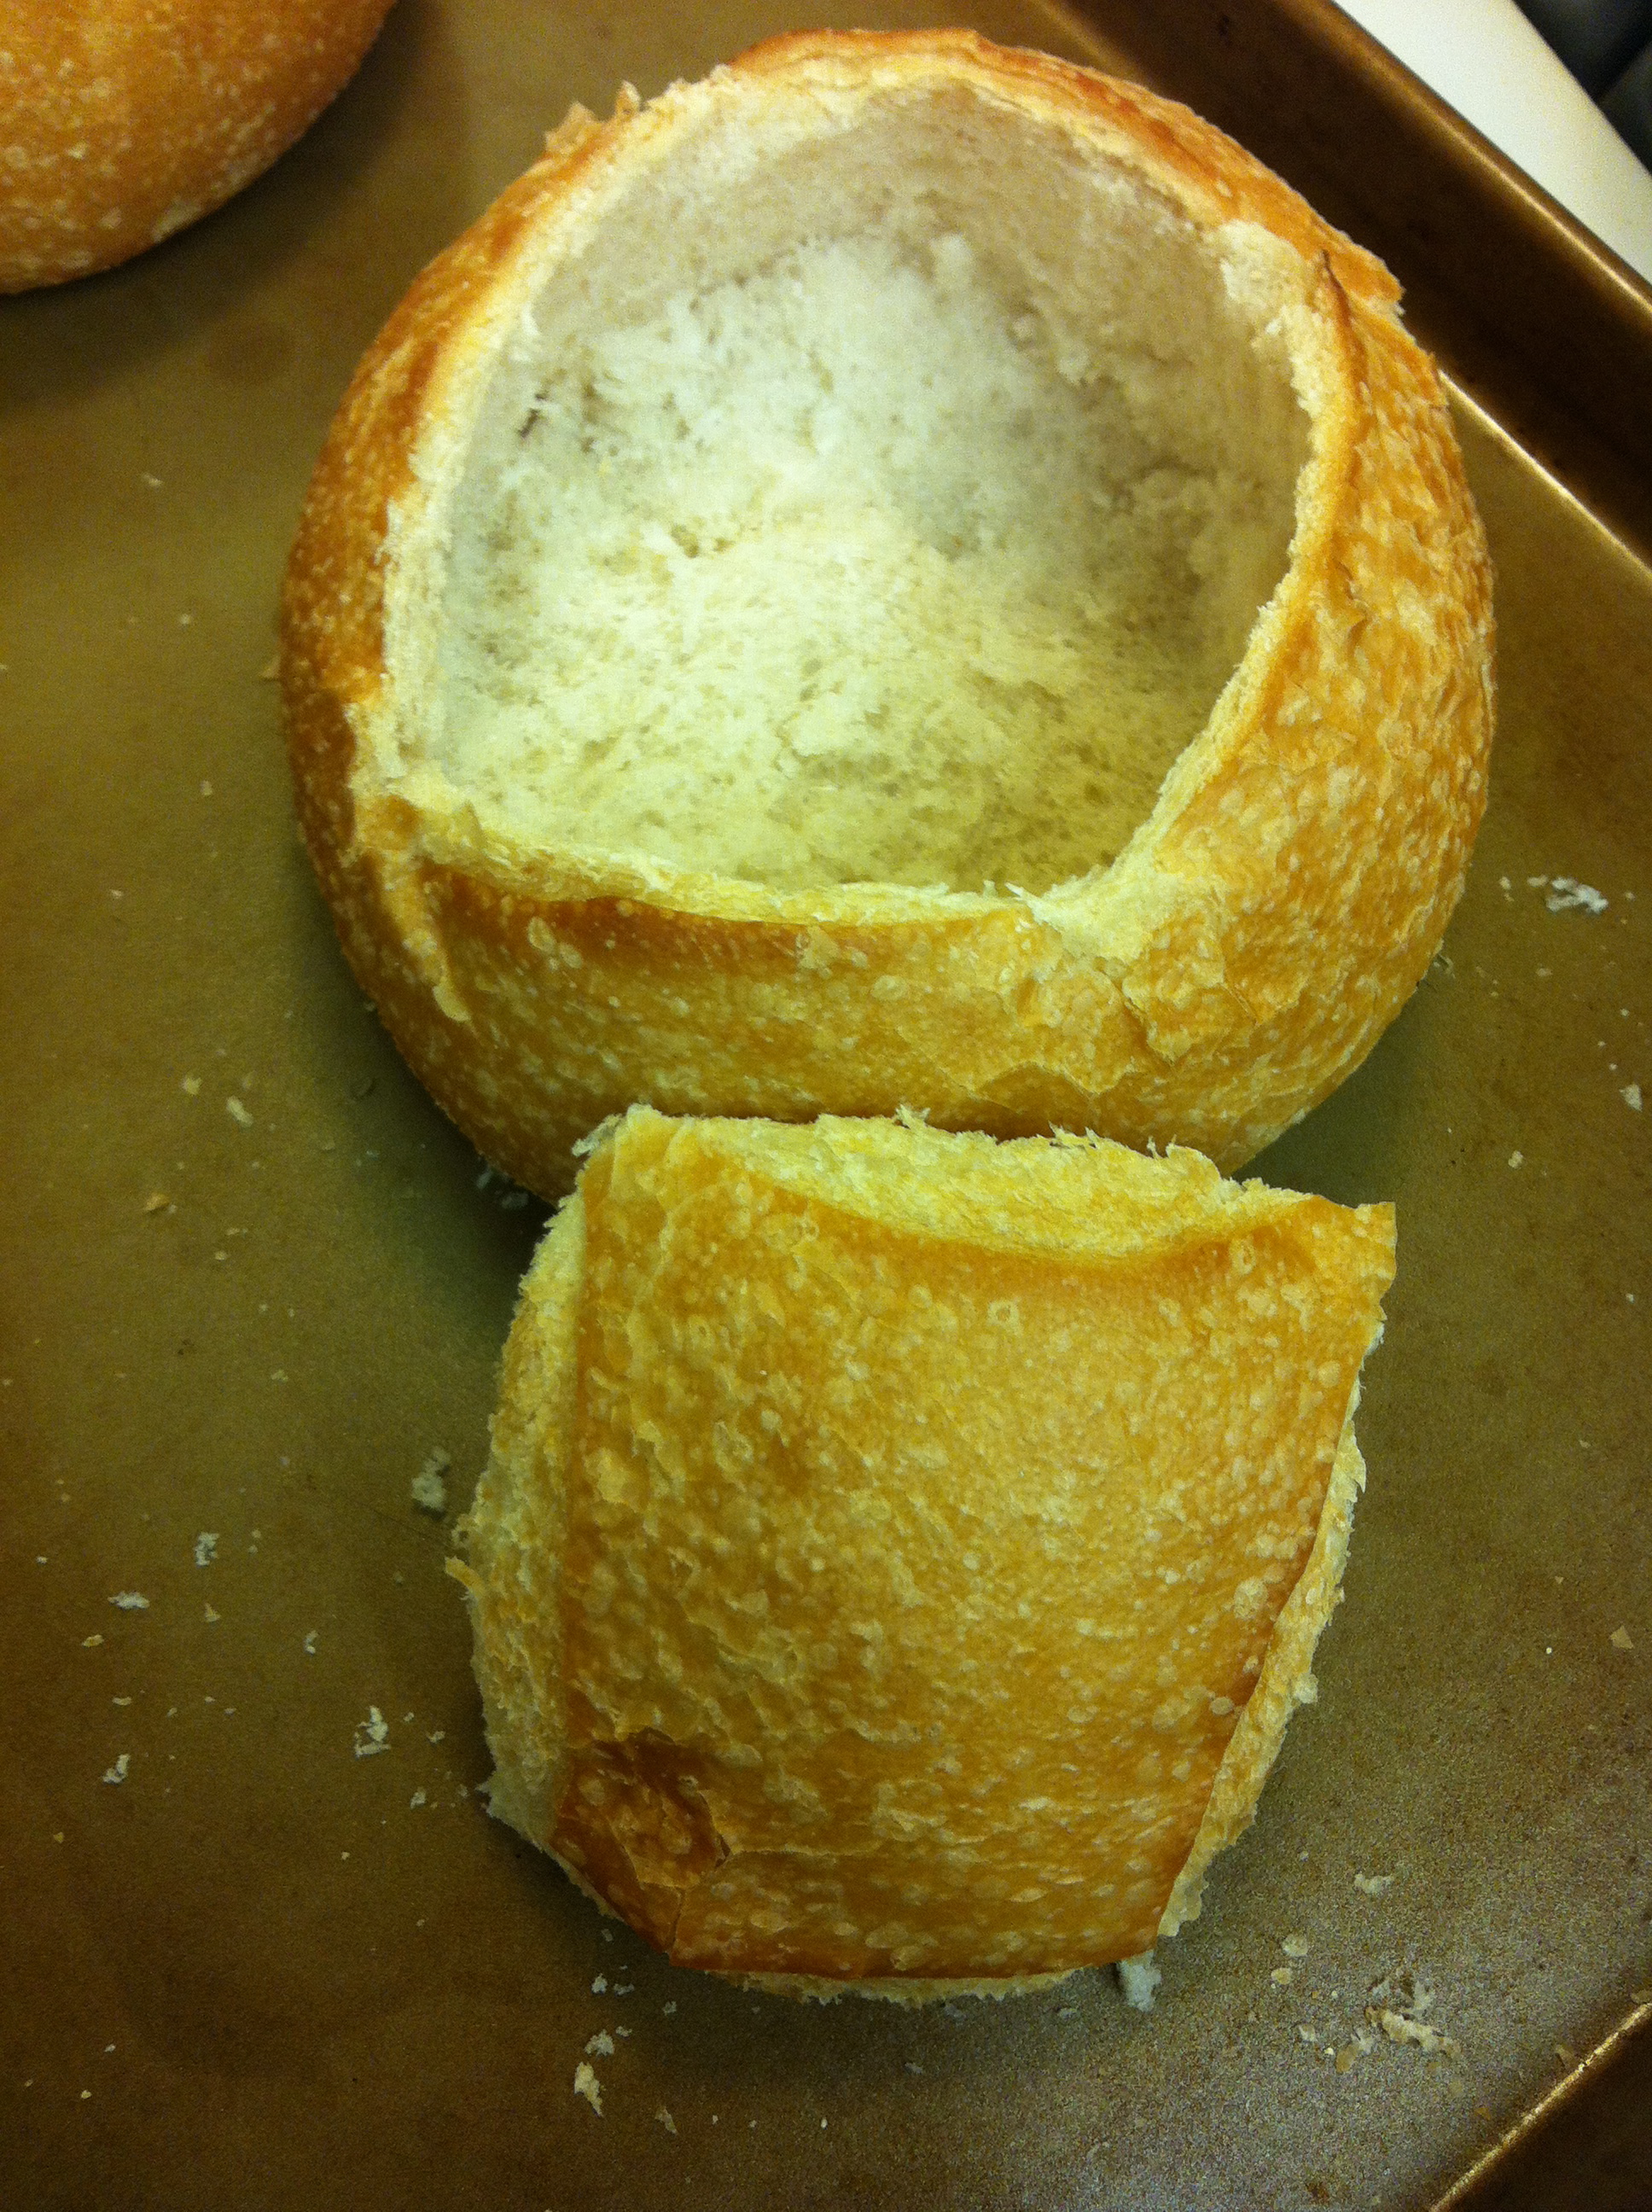 With the lid off, we can concentrate on hollowing out the middle. If you are using a softer loaf of bread, like a basic white bread or beer bread, you can usually just pull out the inside. If you are using a loaf like a sourdough, you can simply use the same knife to carefully cut between the crust and the inside of the loaf. You can leave some bread along the sides inside. It doesn’t have to be perfect. This is just going to help you remove the interior. You need to be careful not to cut through the bottom or the side crust or your bowl will leak. If you do cut too deeply, though, all is not lost. When you begin to remove the inside of the loaf, you can use pieces of it to cover up any slits or any place where you pull out a little too much. This makes the next and final step the most important.
 The final step is brushing the outside and inside of the loaf in olive oil and baking it in a 350˚ oven for about 12-15 minutes. This warms the loaf, acting as a warm bowl, and helps to seal any holes or slits. It also makes your bowl look extra shiny and yummy. If you want to be really fancy, sprinkle sea salt or Parmesan cheese over the top of the lid.
There you go, your bread bowl is complete. You can make your bowls the day before and warm them up right before you fill them. You can serve them with or without the lid, but I like to tear the lid apart and dip it in the soup. Overkill, maybe, but oh, so yummy. You can also make croutons out of the inside bread pieces you removed. Use the insides now for croutons or save them for later, let them dry out and use them for breadcrumbs.
